
Hey, guess what? It is my birthday today! I turned the big FIVE-O...I guess I am now officially an old man...but sure don't feel like one...still feel like I am in my twenties!! Hope that lasts...hehe...
So...about this photo...
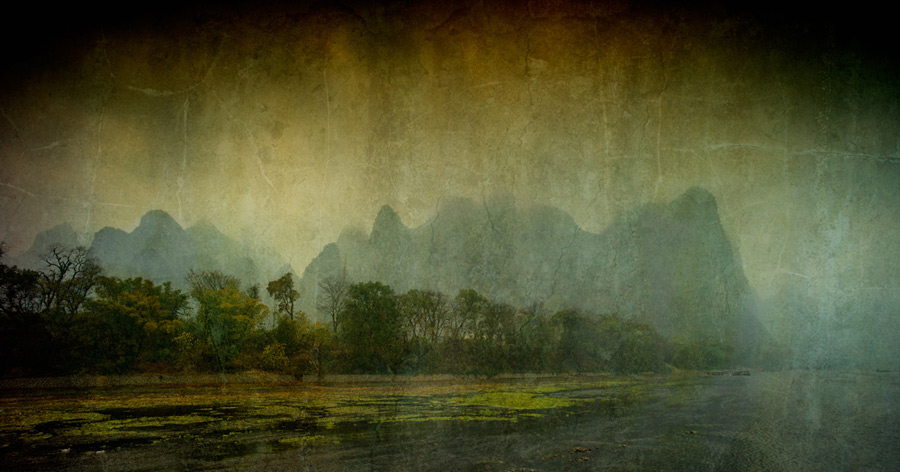
As you know, my trip to China was dampened (literally) by the foggy, rainy, cold weather. On our cruise down the Li River, we could barely see the hills. So, many of my photos had a lack of "light" in them (we didn't see the sun for 10 days), and the skies were pretty plain. This sets up the perfect opportunity to blend some textures into the photo to add some drama to an otherwise drab looking photograph. So how did I do that?
Step 1: When you are out walking around with your camera, take photos of interesting looking textures....I now have a collection of almost 300 textures...look for nice cracks, colors and other interesting textures...you can use these later to create. Warning: people might look at you in a strange way taking photos of walls, but just ignore them...
Step 2: Choose a texture to add to your photo. This is the creative part...do you want to add some color, some texture, some pattern, a special effect, some cracks? Different textures will do different things to your photo...you will be adding another layer to your photo, so just experiment...if it doesn't work, delete the layer and try another texture.
Step 3: Add the texture to your photo by creating a new layer. Use the free transform tool to re-size the texture so that it is the same size as your photograph.
Step 4: Change the blend mode of your texture. I like overlay, soft light or hard light, but give them all a try and see what you like best. You can then change the opacity of the layer.
Step 5: Use a mask to "paint out" what you don't want to show.
Step 6: Add some other textures on top, and then repeat steps 4 and 5.
The possibilities are infinite. You can also change your textures with some filters, change the colors of your textures, darken or lighten them...up to you. Experiment, and have fun!
For this photo, I added two textures....I used softlight as my blend mode for both, and I masked out the "cracks" in the mountains. After I was happy with the textures and masking, I softened the entire image by applying a slight gaussian blur to dull the textures. I then masked out the blur in the trees, and sharpened...but only sharpened the trees (used a mask on that as well).
Hope this helps....


5 comments:
Your not old now , Just Middle aged.
Ditto Rob. You're old when you get to be my age.
Exactly what I was looking for Scotty. Thanks. I have been taking photos of textures for years. Just haven't seen a good use for them until now. I can see I need to learn about masks. Currently, the only one I really use is the unsharp mask.
Happy birthday.
I just found your site from a recommendation by a fellow blogger/photographer. I look forward to reading more and seeing more of your work.
Truly amazing!
Ha! Thanks, Rob! Ya, I don't feel old in any way...
Mr. Charleston...when I get the time, I will post a video on how to use a mask...it is really easy, and once you do it, you will use them all the time.
Kim...welcome!! Hope to see you on a daily basis!
Very beautiful painting. Watch a video in Youtube at : https://youtu.be/XSWPEBUfdHY
Read also an article about the Li River in http://stenote.blogspot.com/2017/12/a-journey-along-li-river.html
Post a Comment