It has been a while since I played with some textures. This is my newest creation. It looks somewhat like a collage of photos, but believe it or not, those people live literally next (within inches) to the tracks.They casually sit while big trains go whipping by them every 10 minutes or so.
I used four different textures in this photo....masked some areas, and played with the order of the layers and the opacity of each layer...isn't digital photography fun??
Showing posts with label textures. Show all posts
Monday, August 13, 2012
Friday, August 10, 2012
Another Guatemala Portrait...A Tutorial
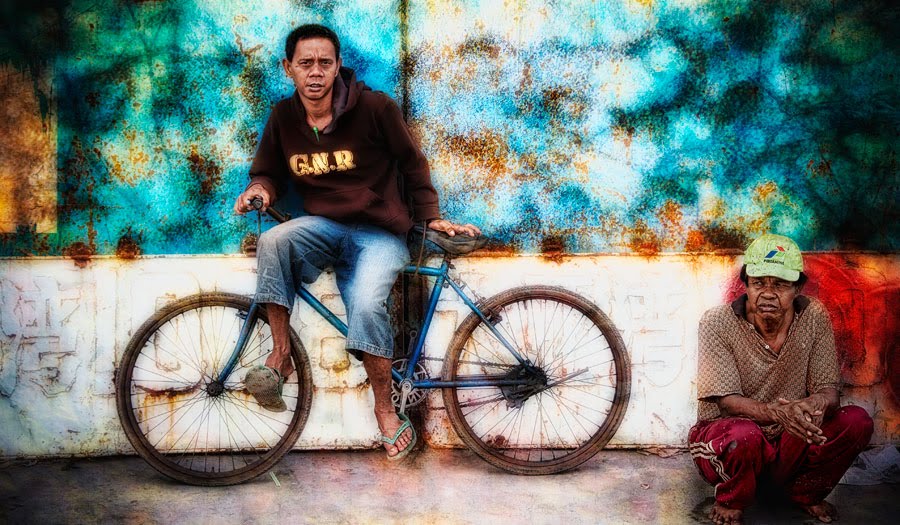
I did some work on this photo. I love the result. I will tell you what I did as I think it will help you enhance your portraits...the original is the bottom photo.
*Note: You might think I am "faking it", and I am...the finished image is really nothing like the original...but isn't that what we do as artists? We fake it? Sure is fun to play...
1. The original photo, as you can see, was cropped big time. With an 18mp camera, I have that luxury...after cropping, I still had a 10mp image...plenty big enough for a nice sized print. I usually don't crop this much...in fact, I try to get the composition correct in camera the best I can. However, in this situation, I didn't want to get right in this guy's face to take his photo. I asked him if I could take his photo, and he let me, but I kept my distance so I could get a more natural expression on his face. I find that once you get permission to take a photo, and you get close, they start to "pose", and no longer look natural...so, I backed off with my 35mm lens knowing that when I got home I could crop closer for a nice portrait...but it is not really a good idea to make this a habit...try to get it right in the camera.
I also cropped using the "rule of thirds" for a more pleasing composition. Took out the blue on the left as well.
2. After cropping, I liked the contrasting colors in the background, but thought it lacked texture...so, I went to my collection of textures (I have around 300 or so now), and added two textures. Changed the blend mode of those two layers to overlay, and masked out the textures on the man and the ground.
3. I then saved the image, and went back to LightRoom. I added a vignette to darken the corners a bit, darkened the shadows, and increased the saturation just a tad...you have to be careful increasing the saturation as you don't want to turn the skin tones to something that looks un-natural.
4. I reopened the image in Photoshop, and applied Unsharp Mask at around 150%. Then masked the entire sharpening out, and painted in the man's face, hat and clothes, then reduced the opacity slightly. If you are going to post your images on the web or print them for your wall, you must over sharpen...they won't look very nice on your monitor, but the web and printing will soften the image.
Have a great Weekend!! See you back here on Monday!!
The finished image...
The original photo...
Wednesday, July 25, 2012
In My Element
That be me standing next to some great textures...in my element. If you are into textures, colors and cool doors, then Antigua is the place for you...
Monday, May 30, 2011
A Couple Of Walls
If you have been following this blog for any time, then you know how I love textures. Yes, these are just a couple of walls, but the colors and texture are what grabbed my attention...the second one is typical here in Indonesia. People close their shops up with these boards, and they have to remember the order the boards go in...sometime they number them, but in this case, they used the name, "Rahman"...cute.


Tuesday, June 22, 2010
Street Photography + Art
I was bored today, so picked out a street photo, and added some texture to it...I like the result.
There is a cool tutorial on using textures by Trey Ratcliff...I have a link to the tutorial to the right...he also has 150 textures that are very cool to use in your own photos. Since I got his textures, I have added another 100 or so of my own...I now have a library of over 300 textures to choose from....they are fun to play around with and the different effects and colors you can get are limitless...give it a try...

Subscribe to:
Posts (Atom)